


5 Tile Installation Mistakes That Cost You Later
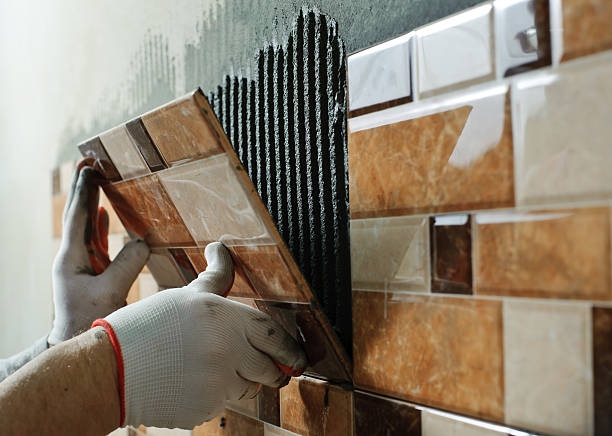
Tile projects look straightforward on the surface. Pick a tile, stick it down, grout it. Done. But plenty of homeowners find out the hard way that a few bad calls early on turn into cracked floors, moldy grout lines, and full tear-outs six months later. Whether you're redoing a bathroom, laying a kitchen backsplash, or tackling a patio, the mistakes that hurt you most aren't the obvious ones. They're the quiet ones you don't notice until the damage is already done. Working with a qualified Tile Contractor in Laguna Niguel CA can save you from most of these headaches before the first tile ever gets set. But if you want to understand what to watch for, here's where things go wrong.
Mistake 1: Skipping Substrate Preparation
The substrate is everything. It's the surface underneath your tile, and if it's not flat, solid, and properly prepped, nothing you put on top of it will last. Tiles need a stable base. If the subfloor has any flex, soft spots, or high and low points, the tile will rock slightly underfoot, and that stress cracks the bond between tile and mortar over time.
A lot of people assume the floor feels fine, so it must be fine. Not always true. You need to check for deflection by walking the area slowly and feeling for any give. Standard practice is to use a long straightedge and identify any variation greater than 3/16 of an inch over a 10-foot span. Anything more than that needs to be corrected before you mix a single bag of thinset.
Concrete boards, self-leveling compounds, and proper waterproofing membranes all exist for a reason. Skipping them to save time or money is exactly the kind of shortcut that leads to hollow-sounding tiles and eventual cracks. Fix the base first. Everything else follows from that.
Mistake 2: Using the Wrong Tile for the Space
Not all tiles are made the same. Wall tiles are typically thinner and have a higher water absorption rate, which is totally fine on a vertical surface but a real problem underfoot. Put a wall tile on a floor and it'll chip, crack, or wear through faster than you'd expect, especially in high-traffic spots.
Size matters too. Big format tiles, say 24x24 or larger, look great in showrooms. On a floor with any flex or on a surface that isn't perfectly flat, they're a nightmare. The larger the tile, the more contact area required between tile and substrate. Any hollow spots underneath a large tile are stress points waiting to crack. For floors with some movement, smaller tiles with more grout joints actually perform better over time.
And outdoor tiles are a whole other category. A tile rated for indoor use won't hold up to freeze-thaw cycles, UV exposure, or rain. Always check the tile's PEI rating and water absorption classification before buying. That one step filters out a lot of bad choices before you spend a dollar.
Mistake 3: Getting Grout Joint Spacing Wrong
Too many people treat grout joints as a style choice only. They're not. Grout joints serve a functional purpose. They give the tile layout room to breathe as materials expand and contract with temperature changes. Go too tight and you're setting up a system with no relief.
Rectified tiles, which are precision-cut to exact dimensions, can handle tighter joints, sometimes as narrow as 1/16 of an inch. But most standard tiles have slight size variations from piece to piece, and a joint that's too small will show those inconsistencies badly. The industry standard for most floor tiles sits around 3/16 of an inch, and for a reason.
Too-tight joints also trap moisture. Water finds its way in, can't fully dry out, and grout starts to crack or pop within a year or two. Grout failure isn't just ugly. It lets water get underneath the tile, and that's where real structural damage begins. Space the joints correctly from the start and you avoid a lot of that grief.
Mistake 4: Forgetting to Seal Grout and Natural Stone
This one's almost universal. Homeowners finish a tile job, step back, admire it, and consider the project done. Then six months later the grout is stained brown and the marble or travertine has water marks that won't come out. Sealing isn't optional. It's the last step, and skipping it costs you.
Grout is porous. Unsealed grout absorbs everything: cooking oil, red wine, muddy water, soap scum. Most of those stains are nearly impossible to remove once they've soaked in. A quality penetrating sealer applied right after installation, and then again every year or two depending on use, keeps all of that on the surface where you can wipe it away.
Natural stone is even more sensitive. Marble, slate, limestone, and travertine all need sealing before grouting, not after. If you grout first, the grout can stain the stone's surface permanently. The team at Innovative Interiors always seals natural stone before grouting begins, which is the correct sequence most DIYers don't know about. It's a small detail that makes a big difference in how the finished surface looks five years from now.
Mistake 5: Ordering Too Little Tile
This mistake feels minor until it isn't. Standard advice is to order 10 percent extra to cover cuts and breakage. For diagonal layouts or complex patterns, bump that to 15 percent. Most people either don't know this or ignore it to save a little money up front.
Here's what happens when you run short. You go back to the store and the tile is either discontinued or from a different production run with a slightly different color batch. Tile colors vary between lots, and the difference is subtle enough that you don't notice it in the box but obvious once it's on the floor next to the original tiles. That mismatch is permanent.
Future repairs are the other reason to keep extras. A tile cracks two years from now, you've got a match sitting in the garage. No tile in storage means a visible patch or a full re-do of the affected area. Ordering a few extra boxes at the start is genuinely one of the cheapest forms of insurance on any tile job.
Frequently Asked Questions
How do I know if my subfloor is ready for tile?
Walk the whole area slowly and feel for any soft spots or bounce. Then lay a long straightedge across the floor in multiple directions and check for gaps. Any variation over 3/16 of an inch across 10 feet needs to be corrected before you start. If you're not sure, get a professional to take a look before you buy anything.
Can I use porcelain tile on both floors and walls?
Yes, porcelain generally works on both. It's dense, low-absorption, and holds up well in wet areas. Just make sure the tile is rated for the specific use, floor-rated tiles are tested for slip resistance and load, which wall-only tiles aren't. Check the packaging or ask the supplier before you buy.
How soon after installation should I seal the grout?
Wait at least 48 to 72 hours after grouting so the grout cures fully. Sealing too early traps moisture inside the grout, which causes problems later. Once it's cured, apply a penetrating sealer and wipe away the excess before it dries on the tile surface.
What's the best way to find Best Tile Contractors in Laguna Niguel CA?
Ask for references and look at actual completed projects, not just portfolio photos. Licensing and insurance matter a lot. Check Google reviews and ask specifically whether they've done projects similar in scope and material to yours. Best Tile Contractors in Laguna Niguel CA will be upfront about timelines, prep work, and what's included in their quote before any work begins.
Is a Tile Contractor in Laguna Niguel CA worth hiring for a small bathroom?
Honestly, usually yes. Small bathrooms have tight corners, multiple cuts around fixtures, and often need proper waterproofing behind the tile. Those are exactly the spots where DIY mistakes happen. A Tile Contractor in Laguna Niguel CA handles the prep and the tricky details that most homeowners underestimate, and the finished result holds up a lot longer.
Tile done right lasts decades. Tile done wrong starts showing cracks, stains, and gaps within a year or two, and fixing it costs more than doing it correctly the first time would have. Take the prep seriously, pick the right materials for the actual conditions, and don't skip the sealing step. Those habits alone put you well ahead of most DIY tile projects.