


Chameleon Flakes for Resin: How to Create Stunning Colour-Shifting Effects
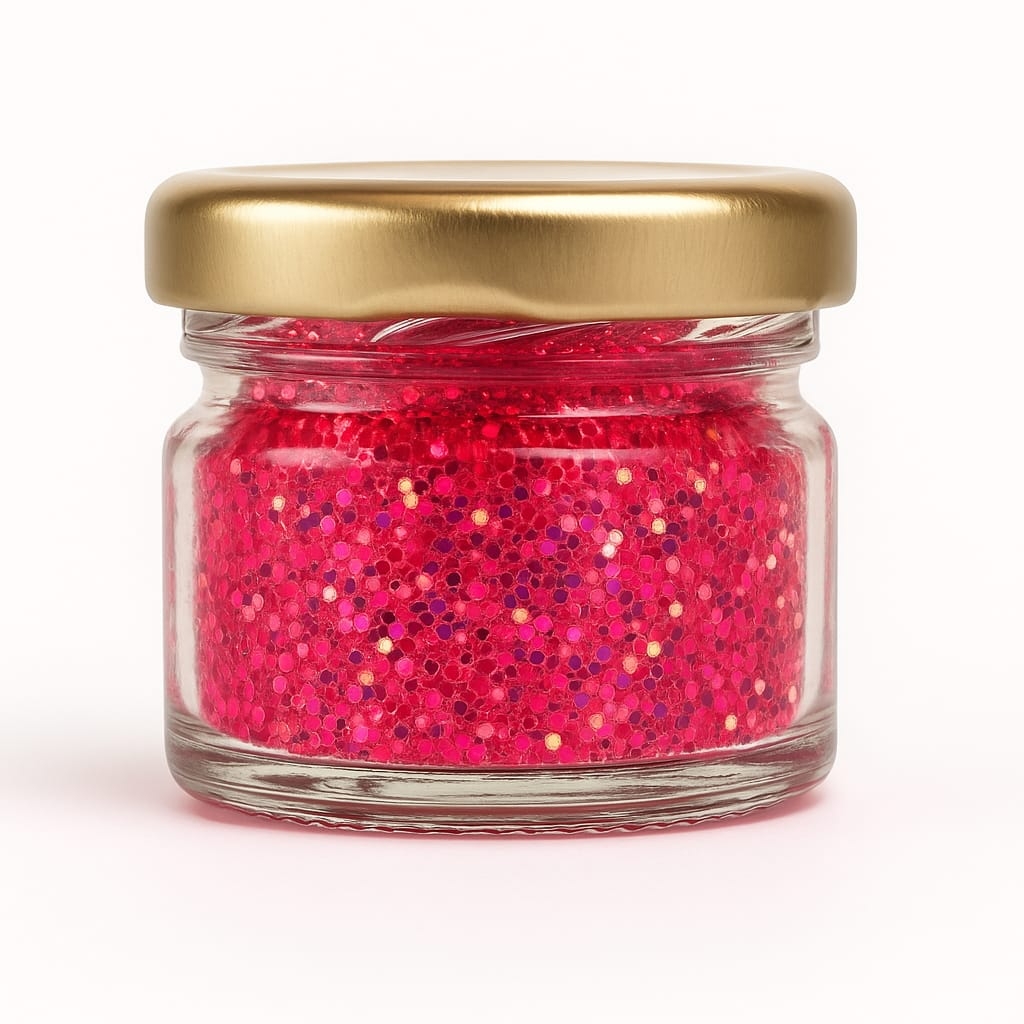
Chameleon Flakes for Resin: How to Create Stunning Colour-Shifting Effects
Some resin designs look different every time you move them under the light. One angle may reveal a deep blue, another may show purple, green, gold, or another contrasting shade. This dynamic appearance is what makes Chameleon Flakes so interesting for resin art and decorative applications.
Unlike ordinary colourants that generally provide one primary colour, chameleon effects can create a changing visual appearance depending on viewing angle, lighting, background colour, and how the material is incorporated into the resin.
For resin artists, craft makers, jewellery designers, and small businesses, Chameleon Flakes can be used to create eye-catching products without relying on complicated moulds or overly detailed patterns.
The real skill lies in controlling the effect.
What Are Chameleon Flakes?
Chameleon Flakes are special-effect decorative particles designed to create a colour-shifting appearance.
The visible colour can change as the viewing angle or lighting changes. This creates a multidimensional appearance that can be difficult to achieve with conventional pigment alone.
In resin applications, chameleon flakes can be used in:
-
Coasters
-
Keychains
-
Jewellery
-
Trays
-
Decorative panels
-
Resin clocks
-
Art pieces
-
Small moulded products
-
Custom craft projects
The final result depends on the flakes, resin transparency, base colour, quantity used, placement, and lighting.
Why Chameleon Flakes Stand Out in Resin Art
A standard pigment generally creates a relatively consistent colour.
A chameleon effect introduces movement into the appearance.
As the finished piece is tilted or viewed from another direction, different colours may become more visible.
This makes the material particularly useful when you want a product to have a strong visual feature without adding a complicated pattern.
For online sellers, it can also make product photography and short videos more engaging because the same piece can show multiple colour effects under changing angles.
The Base Colour Matters More Than You May Expect
One of the most important factors when using Chameleon Pigment for Resin is the background.
The same special-effect material can appear very different over different bases.
Black Base
A dark background can provide strong contrast and help the shifting colours appear more noticeable.
White Base
A white background can create a softer and brighter appearance.
Transparent Base
Clear resin can allow the effect to interact with the depth of the material.
Dark Coloured Base
Deep blue, purple, green, or other darker colours can be tested to enhance particular tones within the chameleon effect.
Before using a new combination in a final product, make small samples using different backgrounds.
How to Use Chameleon Flakes With Epoxy Resin
A controlled process can help produce a more consistent result.
Step 1: Prepare Your Workspace
Keep your:
-
Epoxy Resin
-
Mixing cup
-
Stirring tool
-
Mould
-
Chameleon flakes
-
Gloves
-
Additional colourants
ready before beginning.
Step 2: Mix Resin and Hardener
Measure the resin and hardener according to the manufacturer's specified ratio.
Mix slowly and thoroughly.
Scrape the sides and bottom of the container to ensure the components are properly combined.
Step 3: Prepare the Base Colour
If your design requires a coloured background, create it separately using a compatible Resin Pigment, Mica Powder, or other suitable colourant.
Step 4: Add Chameleon Flakes
Introduce the Chameleon Flakes gradually.
Avoid adding a large quantity immediately.
Mix gently or place the flakes strategically depending on the design you want.
Step 5: Pour Into the Mould
Pour the resin carefully.
If you are creating layers, allow each layer to reach the appropriate stage according to the resin system's instructions before proceeding.
Step 6: Allow Full Curing
Keep the piece undisturbed during curing.
Once completely cured, examine it under different lighting and viewing angles.
How Much Chameleon Flakes Should You Use?
There is no single quantity that works for every resin project.
The appropriate amount depends on:
-
Flake size
-
Resin quantity
-
Desired visual intensity
-
Transparency
-
Background colour
-
Mould size
-
Design technique
A useful approach is to create three test samples.
Sample 1 — Light:
Use a small quantity for a subtle effect.
Sample 2 — Medium:
Increase the quantity for stronger colour shifting.
Sample 3 — High:
Use a larger quantity to understand the maximum visual intensity suitable for your design.
After curing, compare all three.
This makes it easier to select a consistent formula.
Chameleon Flakes vs Chameleon Pigment
The terms are sometimes used interchangeably, but the physical form can be different.
Chameleon Flakes are visible decorative particles that can create a textured or floating visual effect within resin.
Chameleon Pigment for Resin may refer to a finer colourant designed to produce a similar colour-shifting appearance.
The best choice depends on the desired finish.
If you want visible flakes within a transparent design, flakes may provide a more noticeable particle effect.
If you want a smoother colour-shifting appearance, a finer pigment may be more appropriate.
Always check the product specifications and test compatibility with your resin.
Create Depth With Transparent Resin
One of the most attractive applications of Chameleon Flakes is creating depth.
Instead of making the entire piece heavily coloured, keep portions of the resin transparent.
Place the flakes at different positions within the piece.
When viewed from different angles, the flakes can appear to sit at different depths.
This can create a floating or dimensional effect.
Transparent Crystal Clear Epoxy Resin can be particularly useful for designs where internal elements need to remain visible.
Layering Chameleon Flakes
Layering allows you to control where the special effect appears.
For example:
Layer 1: Clear resin
Layer 2: Lightly coloured resin
Layer 3: Chameleon flakes
Layer 4: Clear resin
This can create a suspended effect.
Another design can use flakes in only one section of the mould while keeping the remaining areas clear.
The important factor is to follow the resin manufacturer's guidance regarding layer thickness and curing between layers.
Chameleon Flakes With Mica Powder
Combining Chameleon Flakes with Mica Powder can create a rich visual effect.
Mica powder provides colour and shimmer, while chameleon flakes add colour-shifting detail.
For example:
Blue Mica Powder + Chameleon Flakes
Can create a cool, multidimensional effect.
Purple Mica Powder + Chameleon Flakes
Can create a richer fantasy-inspired appearance.
Black Mica Powder + Chameleon Flakes
Can create strong contrast and make the colour shift more noticeable.
However, avoid automatically using large amounts of both materials.
If the base already contains strong shimmer, a smaller amount of flakes may create a cleaner result.
Chameleon Flakes With Metal Pigment
For luxury-inspired designs, Metal Pigment can be combined with chameleon effects.
A metallic background can provide a reflective base while the flakes create colour variation.
Gold, silver, bronze, and copper effects can each produce different results.
For example, a dark base with subtle gold metallic accents and controlled chameleon flakes can create a dramatic decorative finish.
The key is to decide which effect is the main visual feature.
Chameleon Flakes and Glitter
Glitter Powder for Resin provides visible sparkle, while chameleon flakes provide colour shifting.
Both can be used together, but the quantities should be controlled.
If too much glitter is added, it can visually compete with the chameleon effect.
For a cleaner design, use chameleon flakes as the primary special effect and glitter as a small accent.
Creating Chameleon Resin Coasters
Coasters are an excellent way to test special-effect materials.
A simple design could use:
-
Clear epoxy
-
Dark base colour
-
Chameleon flakes
-
Small metallic accent
Another design could use a light base with flakes concentrated around the centre.
Because coasters are relatively small, they also allow you to test different concentrations without consuming large amounts of material.
Creating Chameleon Resin Keychains
Small moulds such as keychains can produce particularly interesting effects because the flakes are concentrated into a compact area.
For customized keychains, consider using a simple background and allowing the chameleon effect to become the main feature.
Avoid overcrowding small designs with too many decorative elements.
A controlled amount of Chameleon Pigment for Resin can provide enough visual interest on its own.
Chameleon Flakes for Jewellery
Jewellery requires more attention to scale.
Large flakes may create a very different appearance from fine particles.
For small jewellery pieces, test the material in a similar-sized mould before production.
Transparent resin can help create a floating effect where the flakes remain visible inside the piece.
This technique can work for:
-
Pendants
-
Earrings
-
Rings
-
Charms
-
Decorative beads
Product Photography for Chameleon Resin
Chameleon effects can be difficult to communicate through a single photograph.
The colour shift is often more noticeable when the product is viewed from different angles.
For online product presentation, consider showing:
Image 1: Front angle
Image 2: Tilted angle
Image 3: Close-up detail
Image 4: Different lighting
For short-form videos, slowly rotate the finished product under controlled lighting.
This allows viewers to see the changing appearance more clearly.
Common Mistakes When Using Chameleon Flakes
Adding Too Many Flakes
More flakes do not automatically mean a better colour shift.
An excessive amount can make the piece look crowded.
Using the Wrong Background
A background that is too similar to the dominant colour of the flakes may reduce the visible contrast.
Mixing Too Aggressively
Fast mixing can introduce unnecessary bubbles into the epoxy.
Judging the Wet Resin
The final effect should be evaluated after curing.
Using Too Many Special Effects
Combining mica, glitter, metallic pigment, glow powder, and chameleon flakes at high concentrations can make the design visually confusing.
Choose a dominant effect and use other materials sparingly.
How to Build a Chameleon Colour Test Board
If you regularly work with special-effect materials, create a sample board.
Make small cured samples using:
-
Black base
-
White base
-
Clear resin
-
Blue base
-
Purple base
-
Green base
Use the same amount of Chameleon Flakes in each sample.
Label every sample.
After curing, compare the colour shift under different lighting and viewing angles.
This becomes a useful reference when creating new products.
Creating Repeatable Chameleon Resin Designs
For small businesses, repeatability is important.
Once you create a successful design, record the formula.
Include:
-
Resin quantity
-
Hardener quantity
-
Flake quantity
-
Base colour
-
Mica quantity
-
Metallic pigment quantity
-
Layer sequence
-
Mould size
-
Curing conditions
This allows you to reproduce the same appearance for future orders.
It also makes it easier to develop multiple products using the same core design.
Chameleon Flakes for Product Collections
A single chameleon effect can be used across an entire product range.
For example:
Collection 1 — Dark Luxury
Black base + chameleon flakes
Collection 2 — Ocean Inspired
Deep blue base + chameleon flakes
Collection 3 — Fantasy
Purple base + chameleon flakes
Collection 4 — Crystal
Clear resin + chameleon flakes
The same basic material can therefore support different product themes.
Jinoyal Industries Pvt. Ltd. for Resin and Special Effects
Jinoyal Industries Pvt. Ltd. provides materials for resin art and creative applications, including Chameleon Flakes, Chameleon Pigment for Resin, Mica Powder, Metal Pigment, Epoxy Resin, Epoxy Resin Hardener, Glow in the Dark Powder, and Glitter for Resin.
These materials can be used individually or combined to create different visual effects for decorative resin products.
For creators looking for Professional Resin Art Supplies, small-batch testing is a practical way to understand how a new special-effect material behaves before moving into larger production.
A Simple Chameleon Flakes Testing Method
Before using a new combination in production, follow this process:
1. Choose three base colours.
2. Use the same resin quantity in each sample.
3. Add the same amount of Chameleon Flakes.
4. Allow all samples to cure completely.
5. View them under different lighting and angles.
6. Select the combination with the desired visual effect.
7. Record the formula for future batches.
This method makes experimentation easier and helps reduce unnecessary material waste.
Frequently Asked Questions
What are Chameleon Flakes used for?
Chameleon Flakes are used to create colour-shifting and multidimensional effects in compatible resin and craft applications.
Can Chameleon Flakes be used in epoxy resin?
Yes, compatible Chameleon Flakes can be incorporated into epoxy resin. Product compatibility should always be checked before use.
Do Chameleon Flakes change colour?
They can create a colour-shifting appearance in which different colours become visible depending on viewing angle and lighting.
Can I mix Chameleon Flakes with Mica Powder?
Yes. Mica Powder can provide a coloured or shimmering base while chameleon flakes add colour-shifting effects.
Can I use Metal Pigment with Chameleon Flakes?
Compatible Metal Pigment can be combined with chameleon effects to create metallic and colour-shifting designs. Small-batch testing is recommended.
Can glitter be combined with Chameleon Flakes?
Yes. Glitter for Resin can be used as an additional decorative element, but controlling the quantity helps keep the chameleon effect visible.
How do I get stronger colour-shifting effects?
The result depends on the flakes, background, concentration, resin transparency, lighting, and viewing angle. Testing different base colours and concentrations can help identify the desired effect.
Final Thought
Chameleon Flakes offer resin artists a way to create designs that look dynamic rather than static. Their colour-shifting appearance can add visual depth to coasters, jewellery, keychains, trays, decorative art, and other resin products.
The best results come from controlled experimentation. Test different base colours, use measured quantities, experiment with transparent layers, and evaluate the finished piece under different lighting and angles.
You can also combine Chameleon Pigment for Resin with Mica Powder, Metal Pigment, Glitter for Resin, or Glow in the Dark Powder to develop distinctive effects. The goal is not to use every material at once, but to create a balanced design where each material has a clear purpose.
For creators developing repeatable products, maintaining a sample board and recording successful formulas can make future production easier, more consistent, and less wasteful.
Get in Touch
website : https://www.jinoyal.com/
E mail id : Support@jinoyal.com
Contact No : 9289666435
Insta id : https://www.instagram.com/jinoyal/